Trishiks Engineers and Constructions Private limited
Erection Process

Pre-Erection Preparations
Proper planning and preparation are essential for a smooth erection process.
Site Inspection and Preparation:
Verify that the site is level, clean, and accessible.
Ensure that the foundation is completed, cured, and ready to receive the structure.
Check anchor bolts for alignment and elevation as per drawings.
Material Delivery and Inspection:
Ensure all components (columns, rafters, purlins, panels, bolts) are delivered to the site.
Inspect materials for damage, deformation, or missing parts.
Equipment Setup:
Arrange cranes, scaffolding, lifting tools, and welding or bolting equipment.
Ensure proper safety gear and tools are available.
Outcome: Ready-to-use site with verified materials and equipment.
Erection Plan and Layout
Erection Sequence Plan:
Develop an erection sequence to ensure efficient and safe assembly.
Typically, start with main frames, followed by secondary members and cladding.
Marking Layout:
Mark the column locations and building grid lines on the foundation using the erection drawings.
Outcome: Clear guidelines for orderly erection.


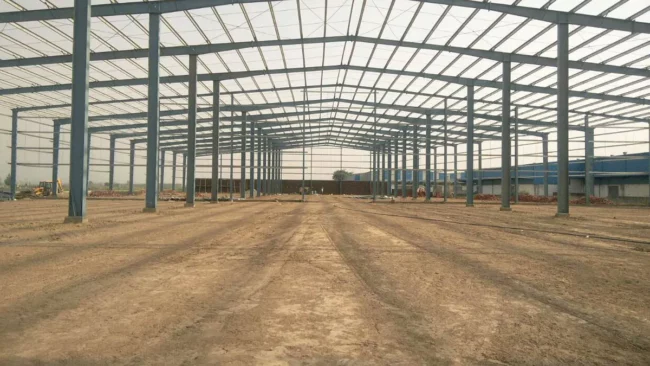
Erection of Primary Framing
The primary frame includes the main structural members like columns and rafters.
Erect Columns:
Lift and place the columns onto the foundation.
Secure columns temporarily with bracing to prevent movement.
Align columns using plumb-bobs or laser levels.
Rafter Installation:
Connect rafters to columns using bolted connections.
Tighten bolts partially during alignment; final tightening will be done later.
Bracing Installation:
Install roof and wall bracing to stabilize the structure temporarily.
Use diagonal rods or cables for bracing as per design specifications.
Outcome: Erected and stabilized primary structural framework.
Erection of Secondary Framing
Secondary members include purlins, girts, and eave struts, which support the roof and walls.
Install Purlins and Girts:
Place roof purlins on rafters and wall girts on columns.
Secure them using bolts or clamps.
Fix Eave Struts:
Install eave struts along the roof edges to support overhangs.
Outcome: Secondary framework completed for roof and wall installation.


Roof and Wall Panel Installation
Roof Panels:
Place and fix roof panels starting from one end of the building.
Overlap panels as per design to ensure weatherproofing.
Use screws with washers to secure panels to purlins.
Wall Panels:
Install wall panels from the bottom up, ensuring proper alignment and overlapping.
Secure panels to girts using bolts or screws.
Openings and Accessories:
Install frames for doors, windows, skylights, and ventilators.
Outcome: Roof and wall cladding completed, making the structure weatherproof.
Alignment and Tightening
Final Alignment:
Check the alignment of the entire structure, including columns, beams, and panels.
Verify dimensions, verticality, and grid spacing as per erection drawings.
Bolt Tightening:
Tighten all bolts to the specified torque using torque wrenches.
Conduct a final inspection of connections to ensure structural integrity.
Outcome: Fully aligned and secure structure.


Installation of Accessories
Fix Gutters and Downspouts:
Install gutters along the roof edges and downspouts for water drainage.
Install Insulation:
If required, fix insulation materials under roof and wall panels.
Attach Doors, Windows, and Louvers:
Secure doors, windows, and ventilators as per design specifications.
Outcome: Fully functional building with all accessories installed.
Final Inspection and Handover
Inspection:
Conduct a thorough inspection of the completed structure, checking for defects or misalignments.
Verify that the building meets design specifications and quality standards.
Handover:
Provide the client with as-built drawings, warranties, and maintenance guidelines.
Outcome: A completed and inspected building ready for use.


Safety Measures
1. Ensure all workers are equipped with personal protective equipment (PPE) like helmets, gloves, and harnesses.
2. Conduct daily safety briefings to address potential risks.
3. Use certified lifting equipment and follow standard operating procedures.
4. Install temporary railings and safety nets to prevent falls during roof panel installation.
